Thursday, December 31, 2009

0 Wish You A Happy New Year 2010

As the year 2009 is almost over I want to wish my all readers a very Happy New Year. May this year bring more happiness and prosperous in your life.


One of my friend send me this Happy New Year wishing trick. And I thought to share it here with you guys.
1. Copy the below content and paste it into notepad or download the notepad from here.
2. Select All and set the Font size to 6

3. Use replace all (Ctrl + H)
4. And click on 'replace all' "6" with "_" (Under score)


6666666666666666666 6666666666666666 6666666666666666 6666666666666666 6666666666666666 6666666666666666 666666666666
6669966666996699669 9999999669966666 9966666669966666 6996699999999669 9666699666666666 6666696666666666 666666666666
6669966666996699669 9999999669966666 9966666666996666 9966699999999669 9666699666666666 6666999666666666 666666666666
6669966666996699669 9666666669966666 9966666666699669 9666699666699669 9666699666666666 6669969966666666 666666666666
6669966966996699669 9999999669999999 9966666666669999 6666699666699669 9666699666666666 6699666996666666 666666666666
6669969996996699669 9999999669999999 9966666666666996 6666699666699669 9666699666666666 6999999999666666 666666666666
6669999699996699666 6666699669966666 9966666666666996 6666699666699669 9666699666666666 9999999999966666 666666666666
6669996669996699669 9999999669966666 9966666666666996 6666699999999669 9666699666666669 9666666666996666 666666666666
6669966666996699669 9999999669966666 9966666666666996 6666699999999669 9999999666666699 6666666666699666 666666666666
6666666666666666666 6666666666666666 6666666666666666 6666666666666666 6666666666666666 6666666666666666 666666666666
6666666666666666666 6666666666666666 6666666666666666 6666666666666666 6666666666666666 6666666666666666 666666666666
6666666666666666666 6666666666666666 6666666666666666 6666666666666666 6666666666666666 6666666666666666 666666666666
6699666669966666666 6966666666699999 9996699999999669 9666666996666666 6996666699669999 9999669966666996 666666666666
6699666669966666666 9996666666699999 9996699999999666 9966669966666666 6999666699669999 9999669966666996 666666666666
6699666669966666669 9699666666699666 6996699666699666 6996699666666666 6999966699669966 6666669966666996 666666666666
6699999999966666699 6669966666699999 9996699999999666 6699996666666666 6996996699669999 9999669966966996 666666666666
6699999999966666999 9999996666699999 9996699999999666 6669966666666666 6996699699669999 9999669969996996 666666666666
6699666669966669999 9999999666699966 6666699666666666 6669966666666666 6996669999669966 6666669999699996 666666666666
6699666669966699666 6666669966699666 6666699666666666 6669966666666666 6996666999669999 9999669996669996 666666666666
6699666669966996666 6666666996699666 6666699666666666 6669966666666666 6996666699669999 9999669966666996 666666666666
6666666666666666666 6666666666666666 6666666666666666 6666666666666666 6666666666666666 6666666666666666 666666666666
6666666666666666666 6666666666666666 6666666666666666 6666666666666666 6666666666666666 6666666666666666 666666666666
6666666666666666666 6666666666666666 6666666666666666 6666666666666666 6666666666666666 6666666666666666 666666666666
6669966666699669999 9999666666666966 6666666999999996 6666666999999966 9999999966699966 6699999999666666 666666666666
6666996666996669999 9999666666669996 6666666999999996 6666666999999996 9966669966669966 6699666699666666 666666666666
6666699669966669966 6666666666699699 6666666996666996 6666666666666996 9996669966669966 6699966699666666 666666666666
6666669999666669999 9999666666996669 9666666999999996 6666666666669966 9969669966669966 6699696699666666 666666666666
6666666996666669999 9999666669999999 9966666999999996 6666666666699666 9966969966669966 6699669699666666 666666666666
6666666996666669966 6666666699999999 9996666996996666 6666666669966666 9966699966669966 6699666999666666 666666666666
6666666996666669999 9999666996666666 6699666996699666 6666666999999996 9966669966669966 6699666699666666 666666666666
6666666996666669999 9999669966666666 6669966996666996 6666666999999996 9999999966699996 6699999999666666 666666666666
6666666666666666666 6666666666666666 6666666666666666 6666666666666666 6666666666666666 6666666666666666 666666666666


It will look like this.


Read More..

Wednesday, December 30, 2009

0 How To Reset Forgotten iPhone Lock Passcode

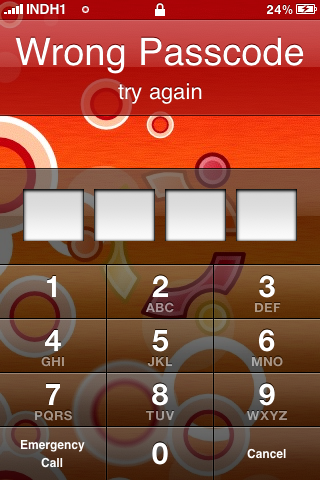
If your iPhone or iPod Touch was locked and you forget your lock passcode and you were out of luck as the only option was to do a fresh restore but now a new utility RMPassword lets you reset your iPhone lock passcode easily on a MAC OS X.
 

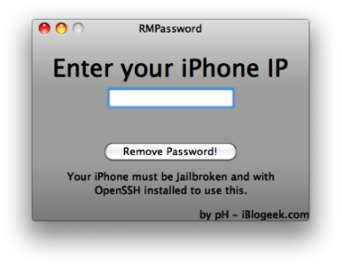
To get your iPhone lock code resetted follow the simple hack as described next, for this to work your iPhone must be jailbroken with Wi-Fi connectivity and should have OpenSSH installed.
Simply Open the Terminal and paste the code below and then press Enter :
sudo gem install net-ssh & & curl-O http://www.iBlogeek.com/downloads/RMPassword.zip RMPassword.zip unzip & & & & mv RMPassword.app / / Applications / & & rm RMPassword.zip & & echo "installed!"
RMPassword will now get installed in /Applications/ folder, Open the folder and double-click RMPassword (lock icon) following the on- screen instructions to reset your iPhone Passcode.

 
Read More..

Friday, December 25, 2009

0 Play Tetris Game In Utorrent

Open utorrent--->Help-->About utorrent.

When t shows a version screen, hit the 't' button

Now you'll see a tetris game. You can play there itself.

Just Hit The "t" on Ur Keyboard and you should be able to play the hidden TETRIS Game.
Read More..

Tuesday, December 22, 2009

0 Add A Related Post Widget In Blogger Part 2

In the last post we have discussed how to add a related post widget in blogger using the original template and does not use the read more widget.
In this post we are going to add a related post widget in blogger using a template that has been modified with Read More widget.

Here it goes. Follow the simple step and you are ready to go.


  • Log in into blogger with your ID
  • Click Layout 


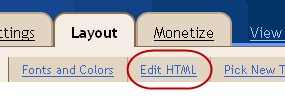
  • Click EDIT HTML tab 


  • Click Download Full template. Please back up your template first
  • Please download the script first
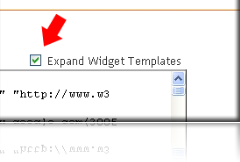
  • Give a mark next to Expand Widget Templates and wait for a few seconds until the process is over.


  • Find the code below (The one in red code):


  • Copy the script you have downloaded, then paste you see below :  


  • Click SAVE TEMPLATE
  • And you are done. 
Read More..

2 Add A Related Post Widget In Blogger Part 1

It is a simple method to make the visitors stay long on your site.Which is to add the related posts widget at the end of every post in your blog. This increases the number of page views and it may even increase the page rank of your blog some day.

    Here it goes by following these simple steps.


    • Log in into blogger with your ID  
    • Click Layout 

    • Click EDIT HTML tab 


    • Click Download Full template. Please back up your template first 
    • Please download the script first
    • Give a mark next to Expand Widget Templates and wait for a few seconds until the process is over. 

    • Find the code below (The one in red code): 


    • Copy and paste the script you have downloaded right under the code
    • Click SAVE TEMPLATE
    • Finish and check the result
    The above steps are for those who use the original template and does not use the read more widget. If you use a template that has been modified with Read More. Use this link.


    Read More..

    Monday, December 21, 2009

    1 Nokia Secret Codes and Tricks and Tips

    Tip 1: Do u know how to use the edit button (abc or pencil button)?
    Here how... in the inbox for example; you want to delete multiple sms, simply hold the edit button, scroll down, and then, press c to delete the marked sms. The edit button can also b used to copy and paste text in sms, simply hold it and scroll across, choose copy. Pretty good for placing song names in ngage.

    Tip 2: Shit happens, on a smartphone, it’s inevitable u do something wrong, and this calls for a format of phone. To format the phone, press *#7370#, then enter the lock code, which is the sec code of the phone.
    NOTE: battery must b full, else if format is disrupted by low battery, consequences will b disastrous
    I heard the code *#7780# works too, pretty much the same I think.
    For 6600 users, to format the phone, there’s an alternative way. Press and hold, and Call (Send) buttons, then power on phone, keep holding on the 3 buttons, till u come to a format screen. This method ONLY works on 6600, and need not enter the sec code. BUT sec code would be reset to default 12345.

    Tip 3: TO NGAGE USERS; Did u know u can install .sis files simply using the cable given? Just plug it in, place the .sis file anywhere on e: (the mmc), not in any folders, root of e:, disconnect, then look for it in manager.

    Tip 4: Save on battery and system memory being used by regularly checking the task manager which can be accessed by holding down the menu button!!

    Tip 5: Type *#06# to display your IMEI serial number, very valuable for the unlocking your phone to other sim cards

    Tip 6: Type *#0000# to view which firmware version you are running

    Tip 4a: Set the screen saver to a short time out period to prolong battery life.

    Tip 4b: Avoid restarting the phone, or repeatedly turning it on and off. This helps increase battery life.

    Tip 7: If you would like to avoid being "blue jacked", keep Bluetooth turned off, or set your phone's visibility to hidden.

    Tip 8: Don't want to carry a watch and a phone? Set the screen saver to show date and time, then you can ditch the watch.

    Tip 9: Save memory when installing apps, by installing over Bluetooth. This can be done using the Nokia phone suite and a Bluetooth serial connection. Only works with .SIS files, so java still has to be sent to the phone, but will save space when using .SIS files.

    Tip 10: Operator logos
    Use a file manager like FExplorer or SeleQ to add the folders: "c: /system/Apps/phone/oplogo". Add a .bmp picture to folder "oplogo" and restart your phone! The .bmp picture size needs to be: 97 x 25 pixels

    Tip 11: Check if the recipients phone is on
    Delivery reports or Type *0# your message in the message composer window space then write your message, the recipient will not see the star zero hash bit - just the message When they read it will relay a message back to your phone showing the time they received it. (Haven’t yet tried it myself though)
    Tip 12: BlueJackingFirst up, you need to know what Bluetooth is. There are lots of types of modern devices that incorporate Bluetooth as one of their many features. PDAs, mobile phones and laptops are a few of these modern devices. Bluetooth means that Bluetooth enabled devices can send things like phonebook/address book contacts, pictures & notes to other Bluetooth enabled devices wirelessly over a range of about 10 meters. So, we've got past the boring part. Now, using a phone with Bluetooth, you can create a phonebook contact and write a message, e.g. 'Hello, you've been blue jacked', in the 'Name' field. Then you can search for other phones with Bluetooth and send that phonebook contact to them. On their phone, a message will popup saying "'Hello, you've been blue jacked' has just been received by Bluetooth" or something along those lines. For most 'victims' they will have no idea as to how the message appeared on their phone.

    Tip 13: While you are viewing a picture in your phone's gallery, press one of these shortcut keys (definitely works on 6600, not sure about other symbians)
    1 - turn image anticlockwise
    3 - turn image clockwise
    * - toggle on/off of full screen
    5 - zoom in
    0 - zoom out
    #15 u can select all files in a folder by selecting THE folder and copy it then paste it somewhere. However you need to make a new directory. fexplorer would let u copy that folder together. Well seleQ can mark files to copy but it really takes time!
    Read More..

    Sunday, December 20, 2009

    0 How To Install Blogger XML Templates

    In this post I am going to tell you how to install a new blogger template from your PC which you have downloaded from the internet to your PC.


    First, log into your Blogger blog. 

    STEP :1 Click the tab entitled “Layout”.


    STEP : 2  Click on “edit html”. You will be brought to the screen code of your blog where you can edit your templates.


    Your blog file is saved in XML code that makes it easy for you to just upload instead of trying to copy and paste an entire page of code like you would with HTML.

    STEP : 3 Click the browse button.


    STEP : 4 Choose the template you downloaded from where you saved it. Open the file. Click on your template with the XML extension. 


    Your file will appear in the browser bar. You may now click “upload”. 


    You may see a warning appear in red telling you that certain widgets like your profile or link list will be copied over. This will happen, but you can always add them back.


    Now, you may view the look of your new blog. To add gadgets, simply go back to the layout tab, click page elements, drop and drag these elements as you wish.

    Read More..

    Sunday, December 13, 2009

    0 Beginner’s Guide to Web Hosting

    Web hosting is basically an Internet service that allows companies and individuals to create their own space on the Internet. Web hosting companies have servers that act as data centres. Customers will give files to their web hosting companies and those files will be stored in the data centres. They can then be found by anybody who wants to visit that person’s or company’s website.
    There are many web hosting services available, mainly these are divided between free web hosting and paid web hosting. Free web hosting is just that – free and the customer doesn’t pay a thing. This is more suitable towards people who are just beginning to have a website on the Internet. A paid web hosting company will charge for their services and offer more features to their customers. This is ideal for small companies that are going to be expanding or for large companies. Free web hosting will only allow for limited space and subdomains for the person’s site.
    There are many different paid web hosting companies that can be found online. The prices will depend on what type of services they offer. One can choose from a dedicated server, where one server will be dedicated to only that person’s file, or from a shared server. This is when many people are using the same server. It’s best to start with a shared server to see if the web hosting company offers what is needed. If the individual is satisfied with the service, it is then an appropriate time to move to a dedicated server.
    There are many benefits that can be derived from web hosting. The first is that the person or company will get their own web space. This provides the person with enough storage to keep all of their files and data to be published online. These files include web pages, images, audio, and videos. These are just a few of the files that may be kept by web hosting. The average amount of space that is provided by web hosting is 200MB. The more expensive packages can reach anywhere up to 500MB.
    Free email is another advantage that customers can enjoy from web hosting. This is much different than the public email addresses provided by Hotmail or Yahoo. This email address will be exclusive to the individual’s website. For example, if the website is called “Music.com”, the email can then be downloads@music.com. These types of email addresses are more than just handy to remember, they are important for serious businesses. It shows customers that they are dealing with a reputable company who is interested in spending money to make their business grow.
    Another advantage to web hosting is bandwidth. This is simply the amount of information that is transferred over the Internet. When a web hosting company provides appropriate bandwidth, it is easier for users to view the web page. This is especially true when there are many images, audio, or videos on one page. Users like to have a website that is easy to use so bandwidth is extremely important.
    Read More..

    2 Free Web Hosting Limits

    If you are thinking about saving on web hosting costs then you should consider free web hosting services that don’t cost a penny and which, though they have not very great functionality, still allows you to have a presence on the Web. In addition, it is usual to get a sub-domain or even a directory to your name and it is often the case that free web hosting services will also allow you to use domains that you have purchased separately. However, before choosing a free web hosting service, you need to know about the top web hosting services and makes sure that you are aware of the limitations to choosing the best web hosting service. So, before reading up on web hosting reviews look at what the limitations to using free web hosting services are and then make your choice.
    Some of the limitations to using free web hosting services include limits on the size of the hosted file, tinier bandwidth each month, does not allow hot linking to files and it may not have the facility of certain files such as MP3, MPEG and ZIP files. In addition, with free web hosting services, you may have no alternative but to place the Webhost Banner or even Popup advertisements into each of your web pages, and worst of all, there is no guarantee of how much uptime you are going to get. Nevertheless, the free web hosting service could provide some extras such as control panel that is web based, transfer of files using FTP and use of scripting languages and even relational databases as also guestbook.
    There are some methods used of giving out free web hosting that includes instant activation, approved activation, and post for hosting as well as forum hosting. In the case of instant activation, you will generally be given very small storage space and there is very little bandwidth allowance as well plus you have to put up with many other limitations as well. And, you will also be at risk of being spammed.
    In case you go for approved activation you will get plenty of space as well as good bandwidth though there will be few features and such approved applications are generally needing approval of administrators who are employed by the free web hosting service and who need to validate your application depending on the information that you have supplied, which is really meant to help avoid spamming from occurring and also discouraging your website from becoming a phishing website.
    It is also usual for some free web hosting services to require that you post on a forum and free hosting that is forum-based will require that you contribute a number of posts before you are given free hosting with them. Such forum based free hosting usually runs on the basis of points for each post which can be used in order to get a free hosting account.
    Another thing that free web hosting services discourage is use of their service for file or image to be hosted and you will not also get a web page because that is where they put out their own advertisements. Also, in case your files exceeds a certain limit, the free web hosting service may not allow it though you can avail of some file hosting service for free that do permit extra large files and also hot linking.
    Read More..

    0 Which Web Hosting is Best For You?

    With thousands of beginners trying their hand at websites, it is certain that the market is becoming quite crowded. From music blogs to gossip communities and technological havens – these online avenues can be a wonderful hobby for people who just want an audience. After all, who wouldn't want to be heard among thousands of visitors every day? For this reason alone, websites are one of the most popular forms of entertainment. While making a website is essential, the majority of beginners do not realize that web hosting is even more important.
    In simpler terms, web hosting provides you with the space to create your masterpiece. When you design your layout, post thousands of pictures, and even set up a chat room, you absolutely need a place to do so. For instance, if you were to do something like this outside of the virtual world, and build a theatre, wouldn't you need your own space? Luckily, web hosting is extremely affordable and can be easy for even the beginners to use.
    After you purchase a domain name, the next step is to find a company that will host your website. There are many different paths you can take to do this, but it depends on your main goals. Therefore, the first thing you need to do is ask yourself why you want to create a website. Is it for personal use – simply to post your pictures from college? Or perhaps your dream is to create the most popular music website on the internet. Regardless of your priorities, companies have built specific web hosting packages based around your needs.
    If you are looking to just post pictures or create something for fun, a free web hosting company is the way to go. There are many of these around the web, including Geocities and AngelFire. These two companies are dedicated to helping beginners. As a result, new webmasters do not need to know extensive HTML or CSS. In this day and age, it is quite easy to build a masterpiece. While these hosts give you a large amount of space and freedom, there are downsides. The majority of companies will stick pop up advertisements on your space, in order for them to market their company. Unfortunately, this is an annoyance for most, and can cause visitors to leave immediately. Luckily, Geocities lets you close the box when you enter the website. Nevertheless, if you are looking for an easy website and do not care about visitors, you simply should try it out.
    On the other hand, if you are looking for something a bit more professional, you should be emptying your wallet. Providentially, 3ix.org and GoDaddy are two companies that offer extremely cheap website hosting. This means that you can easily pay $12/year just for an abundance of space. Still looking for more features? These companies will let you add on everything from FrontPage Maker to extra bandwidth. If you are serious about your venture, these are places to check out.
    Web hosting may sound like a daunting task, but it doesn't have to be difficult. With so many beginners flooding the internet, companies have put it upon themselves to make these programs much easier to use. As long as you can type in your name, have overflowing creativity and an e-mail address, the opportunities are endless.
    Read More..

    Friday, December 11, 2009

    0 Ten Webhosting Company Reviews

    1.GoDaddy.com hosting plans are ideal for most individuals and small businesses. We're the affordable, reliable place to host your site, offering features like a 99.9% network uptime commitment, 24/7 support, and free access to our exclusive Go Daddy Hosting Connection - with EVERY hosting plan!
    • 1,000 Email Accounts
    • Host Unlimited Web sites
    • 50 MySQL Databases
    • Unlimited Email Forwards
    • Forums, Blogging, Photos
    • Go Daddy Hosting Connection
    • $25 Google® AdWords® Credit
    • $50 Microsoft® adCenter Credit
    • $50 Facebook® CreditFREE! SSL Certificate - $29.99 value! 

    Visit http://godaddy.com for details. 


    2. WebHostingPad provides a fast, reliable and comprehensive service that you will be completely satisfied with.
    • Unlimited disk space and bandwidth
    • Host Unlimited websites on 1 account!
    • Award winning customer service
    • 99.9% uptime guarantee
    • State of the art Data Center
    • 30 day money back guarantee
    Webhostingpad.com was formed in 2005 with a team of very successful and proven industry veterans, intent on delivering the best value in web hosting.

    Visit http://webhostingpad.com for details.


    3. Professional web hosting solutions by Yahoo! Web Hosting - Trust the technical details of web site hosting to us, so you can focus on your business!
    • Easy-to-use design tools
    • Free domain name (like www.your-company.com)
    • Unlimited disk space
    • Unlimited data transfer
    • Unlimited email storage
    • 24-hour customer service
    • Reliable and secure hosting
    • $50 Google AdWords credit
    • $100 Yahoo Marketing credit
    Yahoo! Web Hosting - Everything You Need for a Professional Web Site

    Visit http://smallbusiness.yahoo.com/webhosting for details.


    4. Lunarpages Hosting: 350 Gb Hosting Space, 3500 Gb Monthly Traffic, Host 11 Domains on 1 Account, Free Domain Name Forever, Free $700 CoffeeCup Software, Free Setup, 24/7 Toll-free Support, 30-Day Money Back

    Visit http://www.lunarpages.com for details.


    5. Globat provides reliable and affordable web hosting packages for individual and e-commerce web site hosting solutions. Globat hosting: 1000 Gb Hosting Space, 10 Tb Bandwidth, Free Domain Name Registration, Free $25 Yahoo Marketing coupon, Free $30 Google AdWords Credit, Unlimited email/webmail accounts, 24/7 Customer and Technical Support, 30-Day Money-Back Guarantee, FREE Site Builder Tool with Templates

    Visit http://globat.com for details.


    6. BlueHost has been providing hosting solutions to thousands of business and personal web sites since 1996.

    Our professional Web Hosting plans include all the features you are looking for at the best possible price:
    • UNLIMITED Hosting Space (NEW!)
    • UNLIMITED File Transfer (NEW!)
    • Host UNLIMITED Domains!!!
    • 2,500 POP/Imap Email Accounts
    • SSH, SSL, FTP, CGI, Ruby (RoR), Perl, PHP, MySQL
    • 2000/2002 Front Page Extensions
    • Free Domain Forever!
    • Free Site Builder (NEW)
    • 24/7 Superb/Responsive Sales/Support
    Our internet hosting package helps businesses and individuals get high-powered service at a fraction of the cost.

    Visit http://bluehost.com for details.


    7. FatCow has focused the entire company on delivering the best value and customer service experience in Web hosting to the small business user.
    • Unlimited Disk Space & Traffic
    • Free Domain and Instant Setup
    • 30 day money back guarantee
    • 99.9% Uptime
    • cPanel and Fantastico Script Library
    • 24/7 security monitoring, dual redundant M7I routers, 2 firewalls incorporating IDP technology cross-connected to the outside world with BGP border gateway protocol.
    FATCOW OATH - "When you have a question or technical issue, you want someone to be there for you, with an enthusiastic can-do attitude. That's just what you'll find when you contact our friendly Moo Crew! In fact, if we don't deliver a positive support experience, we will give you a free month of hosting. It's that simple".

    Visit http://fatcow.com for details.


    8. WebHostingPad provides a fast, reliable and comprehensive service that you will be completely satisfied with.
    • Unlimited disk space and bandwidth
    • Host Unlimited websites on 1 account!
    • Award winning customer service
    • 99.9% uptime guarantee
    • State of the art Data Center
    • 30 day money back guarantee
    Webhostingpad.com was formed in 2005 with a team of very successful and proven industry veterans, intent on delivering the best value in web hosting.

    Visit http://webhostingpad.com for details.


    9. JustHost are dedicated to providing their customers with the most reliable web hosting service possible at the best possible price. Only $4.95 per month - save 20% if you buy from us!
    • FREE Domain For Life & FREE Instant Setup
    • No Hidden Fees
    • Unlimited GB's of Web Space
    • Unlimited GB's of Transfer
    • Unlimited Domain Hosting
    • Unlimited E-Mail Accounts
    • Unlimited MySQL Databases
    • SSL, FTP, Stats CGI, Ruby (RoR), Perl, PHP, MySQL
    • Professional web hosting from JustHost - affordable price plans, secure servers, first class 24/7 technical support and a wide range of features make hosting your website with Just Host the obvious choice.
      Visit http://www.justhost.com for details. 


      10.  Having a website has become a true necessity nowadays. Here you will find all the required website resources in one place - 24/7 web hosting services by Mad Dog Web Hosting
      • No Set-up Fee
      • Instant Account Activation
      • Multi-lingual Control Panel
      • Site Management Tools
      • Full-featured E-mail Services
      • 99% Service Uptime Guarantee
      • Daily Data Back-up
      • 24/7 Customer Support
      • 1-Hour Support Response Time
      • 30-Day Money Back Guarantee

      Visit http://www.maddogwebhosting.com for details.
      Read More..

      Thursday, December 3, 2009

      0 Symptoms of Hacked Computer

      Here are the symptoms if your computer is infected with a Virus, Trojan and Hackers.

      1. Computer suddenly starts running slow. if this is the only indication then may be you have too many programs running at you computer .

      2. Settings were changed without your knowledge. Your web browser home page or file information.

      3. Suddenly slow internet access. It may sometimes have some other causes ie. poor quality modem, again if bunch of programs running in the background,as file sharing or something.

      4. Additional internet activity detected without you using any programs accessing the internet.

      5. Abnormal running files/processes in the task manager.
      Read More..

      0 Search For Files In Rapidshare, Megaupload etc Through GOOGLE

      If you want to Find the Rapidshare users files OR any kind of file simply do the following method.

      1. Go to www.google.com

      2. Write in search Box site:rapid share.com

      3. And Press enter.

      You will Get All The Users. Keep Going in All the pages searched by Google.

      Also If You want to Download Any Kind Of File, Movie, Or whatever your need is just do the following

      Go to Google.com

      and write in search box site:rapidshare.com HTML Editor

      OR

      site:rapidshare.com Total Video Converter

      Any thing you type after site:rapidshare.com will be searched in rapidshare.com and you will get the list of users having these searched files. I have downloaded those software which are so expensive to buy freely with rapid share search method. You will Find Fully registered Software Here.

      Also you can search all the files in different other websites just do which I did.

      Please do not use this method for piracy. As it is illegal. Use for only educational purpose only.
      Read More..

      Monday, November 16, 2009

      0 Which is the Most Reliable Hosting Company?

      Do you know which is the Most Reliable Hosting Company? I have been following the Netcraft monthly notifications which showcase the most reliable web hosting services and it provides some interesting facts.


      This month’s article reveals that DataPipe and Server Intellect had the most reliable hosting company sites in August 2009. Web.com, New York Internet, Virtual Internet and Hosting 4 Less had the most reliable hosting company sites in July 2009. It is surprising but many of the expected top web hosts are not in this list.
      How do they measure the hosting reliability? Actually Netcraft measures the response times of fifty leading hosting providers’ sites at 15 minute intervals from separate points around the internet, and averages are calculated over the immediately preceding 24 hour period.
      So why are these the best hosting sites? Netcraft explains
      From a customer’s point of view, the percentage of failed requests is more pertinent than outages on hosting companies’ own sites, as this gives a pointer to reliability of routing, and this is why we choose to rank our table by fewest failed requests, rather than shortest periods of outage.
      I checked their table of Hosting Providers sites ordered by failures over the last 1 day and you will find many new hosting companies to look out for. We are on Knownhost VPS hosting and it has served as a very reliable hosting service for us.
      Taken From www.quickonlinetips.com

      Read More..

      0 How To Backup and Restore WordPress Database

      How can you backup and restore your Word Press blog database? If you’ve been blogging long enough, you might have heard the words “Backup Your Word Press Database Regularly!”   THE Only means of restoring your blog should something go wrong such as a bad plug-in installation or an attack by blog hackers.

      DISCLAIMER: This tutorial is provided as it is. I shall not be held responsible in any way should you encounter problems like loss of database and entire blog/website along the way. Use this at your own discretion. It should work for you hopefully!

      How to Backup Word press Database?

      1. Download, install and activate Wordpress Database Backup
      2. Go to Tools in the sidebar of your dashboard and click on Backup
      Under Backup options as shown below, select “Download to your computer” and click on “Backup Now”. When the backup is done you’ll be given an option to choose where to save the backup. Save the backup and you’re done.
      Note: I strongly advice you schedule a daily backup of your database as issues could arise at ANY TIME. Simply navigate down the Backup option page to Scheduled backup. Select the once daily option and select which tables you’d like included in the backup. Type in your email address, click the schedule backup button and all is well. Check to see if your first backup gets delivered successfully the next day.

      How To Restore Wordpress Database?

      The guide below will help you restore your database in no time using the backups that have been made in the past. I’m assuming that your current database has been damaged or is behaving erratically.
      1. Log into your FTP account and Delete everything in the /wp-content/cache directory.
      2. Log into PHP MyAdmin and select your wordpress database. It’s mandatory you remember clearly well the name of your wordpress database especially if you auto-installed it using Fantastico.
      A list of all of the tables contained in the database will be shown. As shown below, click on Check all to select all the tables then select the Drop option to delete them PERMANENTLY.
      You’ll be prompted to confirm the Drop action
      Choose Yes and all tables will be DELETED with this result displayed on your computer screen
      Now that the database for wordpress is empty, let’s proceed to uploading our database backup file
      Click on the Import menu as shown above and then browse to the location of the backup file as shown below. Once you’ve done that, click on go and wait for the upload process to finish.
      A successfully database restoration will show you something similar to the message below
      Once the whole restoration process is done, log into your dashboard and make sure everything is working okay. Don’t forget to browse your site to see if it’s functioning as expected.

      This guest post was written by Udegbunam Chukwudi who shares make money online and blogging tips @ his PR 2 dofollow blog. You can also write a guest article and share your WordPress tips.
      And taken from www.quickonlinetips.com

      Read More..

      Sunday, November 15, 2009

      0 Download Youtube Video From BlackBerry

      Hey all the BlackBerry owners. Now You can Watch and download You Tube videos directly from your Blackberry, with these easy step.
      You just need to install software kbbtube.mobi, for downloading video from blackberries.
      Now Blackberry became a gadget that has a second function as a mobile internet except notebook.

      So lets get the Blackberry software for free and you can download or watch youtube videos or other streaming video directly from Blackberry
      Copy paste this URL from your browser:  http://www.download.kbbtube.mobi/

      Read More..

      Friday, August 28, 2009

      1 Download Video From Youtube Without Downloader

      So guys from now if you want to download video from youtube you didn't need any downloader
      just add "kiss" in the link!!!!!
      for example!!!
      if this is a video link
      www.youtube.com

      so just add kiss
      like this
      www.kissyoutube.com
      Read More..

      Monday, August 17, 2009

      2 Top 20 Tips To Keep Your System Faster

      Follow these tips and you will definitely have a much faster and more reliable
      PC! Most of the below tips works for windows XP.

      1. Wallpapers: They
      slow your whole system down, so if you're willing to compromise, have a basic
      plain one instead!

      2. Drivers: Update your hardware drivers as
      frequently as possible. New drivers tend to increase system speed especially in
      the case of graphics cards, their drivers are updated by the manufacturer very
      frequently!

      3. Minimizing: If you want to use several programs at the
      same time then minimize those you are not using. This helps reduce the overload
      on RAM.

      4. Boot Faster: The 'starting Windows 95/98' message on startup
      can delay your booting for a couple of seconds. To get rid of this message go to
      c: and find the file Msdos.sys. Remove the Read-Only option. Next, open it in
      Notepad or any other text editor. Finally, go to the text 'Options' within the
      file and make the following changes: Add BootDelay=0. To make your booting even
      faster, set add Logo=0 to remove the Windows logo at startup.

      5. Restart
      only Windows: When restarting your PC, hold down Shift to only restart Windows
      rather than the whole system which will only take a fraction of the time.


      6. Turn Off Animations: Go to Display Settings from the Control Panel
      and switch to the Effects Tab. Now turn off Show Windows Content While Dragging
      and Smooth Edges on Screen Fonts. This tip is also helpful with Windows XP
      because of the various fade/scroll effects.

      7. Faster Start-Menu Access:
      Go to the Start menu and select Run. Now type Regedit and hit Enter. The
      Registry Editor will appear on the screen. Now, open the folder HKEY_CURRENT_
      USERControl PanelDesktop. You should see a MenuShowDelay value. If you don't
      then do the following: right click on a blank space in the right pane and select
      NewString. Change the name in the new value to MenuShowDelay. Now that we have
      the MenuShowDelay value, double click on it and enter 0 in the value data field.
      This sets the start menu delay to 0 milliseconds.

      8. Resolutions: If you
      are willing to do anything for faster performance from your PC, then try
      lowering your display resolution. The lower it is, the faster your PC.


      9. Turn off Active Desktop: Go to your Display Properties and switch to
      the Web tab. Uncheck View My Active Desktop As a Web Page. Since the Active
      Desktop option under Windows 98 uses a lot of system resources, this option can
      have a dramatic effect on the speed of the whole system.

      10. Defragment
      Often: Windows 98's Defrag tool uses Application Acceleration from Intel which
      means that when you defragment your drive, data is physically arranged on the
      drive so that applications will load faster.


      11. Take your PC to
      Bed: Using the Advanced Power Management feature under Windows 98 gives you the
      option to use the sleep command. That way, you can send your PC to sleep instead
      of shutting it down and then restarting it. It's as simple as pressing a button
      and then pressing the same button to wake it up. You can tell Windows after how
      many minutes/hours of inactivity to automatically sleep the machine in the
      Advanced Power Management section of the Control Panel.

      12. Faster
      Internet Access: If you use the Internet for reference and the sites you visit
      are rarely updated then try the following. In IE (the same can be done in
      Netscape) go to Tools, Internet Options. Next, click on Settings... In the
      Temporary Internet Files section. Finally, select Never for the first option and
      double the amount of storage space to use, click OK!

      13. Benchmarking:
      Benchmarking can be very useful when run frequently. It can tell you how your
      PC's components are performing and then compare them to other machines like
      yours. For example, when you overclock your PC, you want to know how much more
      speed you have and whether it is stable. All this and more can be discovered
      using benchmarking. An excellent piece of software for doing this job is SiSoft
      Sandra which can be found in the Downloads File Archive!

      14. Refresh the
      Taskbar without restarting: If you in some way change the taskbar, either in
      Regedit or elsewhere, you can refresh the task bar without restarting. Hold down
      Ctrl Alt Del, and double click on Explorer. Say Yes to close Explorer, but no to
      closing Windows. This will refresh the Taskbar and system tray.

      15.
      Quick CD Eject: Instead of pushing the button on your drive, right-click your CD
      drive letter in My Computer and click on Eject. This will also remove any icons
      that have become associated with the CD drive.

      16. Start Up Programs:
      Windows can be slowed down when programs run on start up. To eliminate this,
      check your Start up folder. You can access it from the start menu: Start,
      Programs, Start Up. Another way to eliminate programs from loading even before
      Windows actually starts is by doing the following: Click on Start, then Run.
      Type msconfig. It will take quite a long time for this program to load, but when
      you finally see it on your screen, explore the different tabs. They all have to
      do with how quickly your PC boots, so select what you want, and uncheck what you
      don't want!

      17. Fonts: When Windows starts, it loads every single font
      in the Fonts folder. Therefore, the more fonts you have, the slower the booting
      process. To get rid of unwanted fonts, simply go to the Fonts folder under
      c:windows and remove whatever you don't want. Fonts that have a red letter 'A'
      as their icon are system fonts, so don't delete them.

      18. Stretching
      Wallpapers: Don't "stretch" your wallpaper in Windows 98 since it actually slows
      Windows down when you drag icons around on the desktop.

      19. RAM Matters:
      If you have less than 32MB then you should seriously think of upgrading it to at
      least 64MB. Windows runs much more smoothly with 64MB or higher and tends to use
      less hard disk space for virtual memory.

      20. Partitioning: A very nice
      little thing you can do to boost system performance. By partitioning your hard
      drive, splitting one physical drive into several logical ones, you can gain
      several advantages.
      1. If you get a virus or you accidentally format a
      drive, not all will be lost.
      2. By placing the swap file (Win386.swp) on a
      separate drive, The swap file will be less fragmented and thus, faster.
      3.
      Place Windows on a separate drive and whenever you need to reinstall it, you
      rest assured that your data is safe on a separate drive. Partitioning can be
      done using a few programs such as FDisk which comes with DOS. However, FDisk
      formats everything on the hard disk before partitioning. Alternatively, you can
      use Partition Magic from Power Quest to partition your hard disk without losing
      your data.
      Read More..

      0 SMS Tips & Tricks

      Top Ten Handy Tips for Fast SMSing

      > Txt using both hands.
      > Learn the location of ur letters.
      > Rmbr 2 txt in shrthnd.
      > Check ur txting the right number.
      > Limber up ur fingers with some stretching exercises.
      > Nip ur nails in the bud.
      > Find the fastest finger 4u.
      > Get 2 know ur phones functions and features.
      > Clean ur phone. A non-stick mobile is a quick mobile.
      > Practice makes perfect, become a txt machine!

      SMS Shorties

      Text messaging from a cellular phone can become quite a daunting task. To save your fingers the trouble here is a list of a few 'SMS shorties'

      AFAIK As far as I know
      Cm Call me
      Cul See you later
      Gr8 Great
      PCM Please call me
      SRY Sorry
      Read More..

      Thursday, August 13, 2009

      0 Check Your Mobile Is Original Or Not

      In this post
      I would like to share the trick to know whether your
      mobile is original or not?

      First:
      Type *#06#

      After you enter the code
      you will see a new code (Phone serial Number or IMEI) contains 15 digits:

      No 1 2 3
      4 5 6 7 8 9 10 11 12 13 14 15
      Phone serial no. xxxxxx02 or 20xxxxxxx


      IF the digit number Seven & Eight is 02 or 20 that mean it was
      Assembly on Emirates which is very Bad quality

      IF the digit number Seven
      & Eight is 08 or 80 that mean it' s manufactured in Germany which is not
      bad

      IF the digit number Seven & Eight is 01 or 10 that mean it's
      manufactured in Finland which is Good

      IF the digit number Seven &
      Eight is 00 that mean it was manufactured in original factory which is the best
      Mobile Quality ...

      IF the digit number Seven &
      Eight is 13 that mean it was Assembly on Azerbaijan which is very Bad quality
      and very dangerous for health.
      Read More..

      Wednesday, August 5, 2009

      0 How To Get Traffic With Twitter

      Twitter is a social networking and micro-blogging service that allows users to send “updates” (or “tweets”; text-based posts, up to 140 characters long) to the Twitter website.There are a few ways in increase traffic from Twitter.This video tutorial show you how to generate more traffic and exposure to your website or blog by using some extra secret add ons and twitter plug-ins which will help you to gain more followers very quickly.

      Read More..

      0 How to Make your Computer Look Like it is Frozen ?

      ITs Easy And Simple Let See:

      Today I'm gonna share with you how to make your computer look like it is frozen.The person sitting there can't click any icon on the desktop, can't enter any program.1- Press PrintScreen.
      2- Go to paint: edit-> paste
      3- Save it, and put it on your background
      4- Right click on your desktop -> Arrange Icons -> Untick "Show Desktop Icons"
      Now your desktop will be just an image of what you had, and so no one can click or do anything!


      When you finish the trick, don't forget to:

      1- Right click on your desktop -> Arrange Icons -> Tick "Show Desktop Icons"
      2- Change the background because it might make you dizzy.
      Read More..

      0 How To Delete An "Undeletable" File Without Software

      Delete An "undeletable" File

      Open a Command Prompt window and leave it open.
      Close all open programs.
      Click Start, Run and enter TASKMGR.EXE
      Go to the Processes tab and End Process on Explorer.exe.
      Leave Task Manager open.
      Go back to the Command Prompt window and change to the directory the AVI (or other undeletable file) is located in.
      At the command prompt type DEL where is the file you wish to delete.
      Go back to Task Manager, click File, New Task and enter EXPLORER.EXE to restart the GUI shell.
      Close Task Manager.

      Or you can try this

      Open Notepad.exe

      Click File>Save As..>

      locate the folder where ur undeletable file is

      Choose 'All files' from the file type box

      click once on the file u wanna delete so its name appears in the 'filename' box

      put a " at the start and end of the filename
      (the filename should have the extension of the undeletable file so it will overwrite it)

      click save,

      It should ask u to overwrite the existing file, choose yes and u can delete it as normal.
      Read More..

      Monday, August 3, 2009

      0 Tip to Quickly Make A Website Your Home Page in Microsoft Internet Explorer 7 and Mozilla Firefox 3.0.5

      We all love our home as we are comfortable and can enjoy by having fun and entertainment etc. in it. The same applies to the online world too. There must be a site on the Net that you love all above the rest and want it to be your home page so that it always gets loaded whenever you open your Internet browser.
      Here is a small tip to quickly add that lovable site of yours in Microsoft Internet Explorer 7.0 and Mozilla Firefox 3.0.5 versions (Should probably work in other versions too of these two browsers too).
      To make a site as your home page in Microsoft IE 7 Internet browser, do the following:
      - Open the website that you want to make as home page in the MS IE 7, this can be done by typing the site’s address in the address bar and then pressing Enter. For example:http://techtipntrick.blogspot.com/
      Read More..

      0 Computer Electromechanical And Optical Mouse-Maintain And Keep Them Fit Without Problems-Part 1


      In this post, I am going to tell you about some of the real working ideas from my experience to help you maintain your computer electromechanical (with trackball and buttons – mechanical parts and circuitry) and optical mouse (with light generation system, sensors for movement detection, buttonsPicture of Dell Vostro 400 optical mouse top view and click assembly – mechanical and electronic circuitry). I have used both electromechanical and optical mouse so far and this post covers the tips to maintain these two types of mouse.


      Mouse is an important input device that makes working on graphical interface easier through moving the cursor, clicking the icon to select it, entering the input through press of a button and drag and drop etc. Imagine working on a GUI (Graphical User Interface) screen with menus, options, icons and operations that needs clicking, dragging and dropping and finding that when you drag your mouse, it goes haywire in some other direction Or you can doing single click and double click happens Or you are right clicking on desktop and none of the menu is appearing and similar mouse activities that stops working suddenly or works intermittently. These types of erratic movements and stopping of mouse operations happens normally due to dust and dirt in your mouse buttons, ball (in electromechanical mouse), sensors and scroll wheel assembly.
      Here are the tips to maintain your PC mouse (electromechanical and optical) and keep it fit without any operational problems:
      1. Don’t Let Dirt And Dust Go Inside Your PC Mouse
      Keep the computer operational area clean and dirt free. Don’t eat and drink at your computer desk and cover the computer and mouse when not in use. The idea here is not to let the dirt and dust go inside the computer mouse (there are gaps between the mouse left click and right click buttons, scroll wheel (at top) and at the bottom – track ball and light sensor.
      2. Use A Good Quality Mouse Pad and Keep It Clean
      Don’t use a mouse pad that is crumpled and slippery or if you are directly operating a mouse moving it on your computer table (without a pad) then ensure that the surface is plain and clean. Operating an electromechanical – track ball mouse on slippery surface is bound to give the user problems in using it.
      The mouse pad that I got with my Dell Vostro 400 didn’t turn out to be of good quality. It was very thin and got crumpled (making its surface like a tiny mountain) in few days. Also the mouse pad should not move when you move your mouse on it (if the pad is moving, stick it to the desk surface or wherever you are placing it).
      3. Maintain A Small Preventive Maintenance Schedule


      Everyday or may be alternate days, check your mouse and its pad and clean both of them with a good quality soft cloth (that doesn’t leave threads while cleaning or when pulled slightly) with little isopropyl alcohol on it (the cloth should have cleaning solution to make it moist enough not to be dropping from the cloth). Oh! Make sure that the computer is powered off when doing this cleaning operation on your mouse and mouse pad.
      Use a mouse cover to put it on your computer mouse when it’s not in use for extended hours.
      4. Be Nice And Gentle With Your PC Mouse
      Your computer can sometimes malfunction due to some software or hardware issue while you are using your mouse in a program or installing new untested software on your PC. Don’t blame your mouse when your computer freezes and the mouse stops responding. I have seen people banging their computer mouse on the table even when their PC mouse is not responsible at all for the problem (Examples- Surfing not happening despite clicking on Refresh, response slow on an online GUI form leading to slow cursor movement and unfamiliarity with using the mouse in a drawing and editing software etc. – expecting a mouse operation whereas the SW doesn’t support that)
      Picture of Dell Vostro 400 optical mouse bottom view
      Banging your mouse hard can damage its mechanical (plastic casing, buttons, track ball, scroll wheel) and electronic parts – sensors, light generation and detection and printed circuit board.
      The probability that even after you follow the above tips, you will have to clean the mouse from inside is high as some part of dust and dirt definitely will definitely go inside a computer mouse through the small gaps.
      So, in next series of this post, I will write and show how to clean an optical mouse from inside. The internal cleaning may have to be done once in few months (3-6) depending on the volume of dust and dirt at your computer’s work environment.
      I am sure that though the tips for maintaining your computer electromechanical and optical mouse are simple but they are definitely effective. Let me know if I am right :)
      Did these tips help you at all? How do you maintain your computer mouse? Let me know.
      Take care of your mouse – computer one and not the real one :)

      Read More..

      0 Computer Electromechanical And Optical Mouse-Keep Them Fit Without Problems-Part 2

      This post is going to help you in doing core maintenance of your wired electromechanical (trackball one) and wired optical mouse (with LED – Light Emitting Diode generating light and its detection) by giving you directions on their internal cleaning.
      I don’t have an electromechanical mouse, so I won’t be able to show you the relevant pictures of its cleaning operation done from its back.
      If you are facing problem with only dragging of your computer’s electromechanical mouse (the cursor going haywire) then you can do the following:
      - Switch off your computer after its proper shutdown.
      Pull out mouse cable from the back of the CPU and take it away at some distance so that the dirt and dust that you clean doesn’t go to the other parts of your computer. If that’s not possible as your mouse wire is fixed with other wires, don’t worry. Follow the same procedure as given next.
      - Keep a sheet of clean newspaper/paper/cloth under the mouse and invert it so that the trackball part faces you.
      There will be a circular plastic cap that will be stopping trackball from coming out yet allowing the mouse track ball to rotate. Check the direction of the arrows in which you have to move the circular cap to let the track ball come out. Normally, rotating the circular cap in anti clockwise direction removes trackball cap from its position and let the trackball comes out.
      - After the trackball has come out, clean it thoroughly with a clean cotton cloth rinsed with isopropyl alcohol. You should clean the track ball until it appears clean and pleases you look wise without any dirt or grease on it. The purpose of cleaning track ball is to make it non-slippery and ultimate clean close to when it was new.
      - Now with the cleaned trackball outside, you should similarly clean the three small sized wheels (has attached sensors to detect the mouse movement in a particular direction) that touch the periphery of trackball when it’s inside. You can use the cotton cloth rinsed with isopropyl alcohol to do so. While cleaning these three wheels, apply slight pressure and remove the dirt and grease etc. on their complete surface and wherever you could see inside the electromechanical mouse. You can also use a good quality brush rinsed with isopropyl alcohol to do thorough cleaning of optical mouse from inside.
      - After the trackball and the mouse motion detecting wheels have been cleaned, you should fit the trackball back in the inverted mouse and tighten the circular plastic cap that holds the trackball in its position (Rotating in clockwise direction should do it). You can now connect the electromechanical mouse to the computer by connecting its connector back from where you pulled it out. After trackball and sensor wheels cleaning, your mouse movement should now be fine (if it was due to the dust and dirt only).
      Now, On to internal cleaning operation of optical mouse that will help its users having problems in dragging, dropping, clicking and scrolling while using it. Yes, it can sometimes happen that you face all these problems simultaneously if you haven’t cleaned your optical mouse for months. My friends having electromechanical mouse with problems in right and left clicking can also get the clues of opening the mouse and cleaning the click assembly for the tips given next for optical mouse.
      Kindly refer to the labeled picture of my DELL Vostro 400 optical mouse with top cover removed and all the main parts shown.
      Dell Vostro 400 optical wired mouse internal view
      The shown picture will give you clear idea of what I am writing next. So, here is what you can do to do a complete cleaning of your optical wired mouse:
      - Shutdown and power off your computer whose optical mouse internal cleaning is to be done.
      - Either remove the optical mouse connector from the back of the system so that you can take it way for cleaning or if you can’t do it, cover other parts of your computer so that they don’t get dirty.


      - Place the optical mouse on a clean paper sheet/cloth and invert it so that the LED portion (bottom side that rests on the mouse pad/desk) faces you.
      - Normally there is a screw at the lower bottom that keeps the lower plastic cover of the mouse tightened with the upper cover. Also the top plastic cover of the mouse has two plastic female rectangular grooves that fit in the male grooves of the lower plastic body. Remove the screw by untightening it with a star screwdriver with the bit size matching the screw and slim enough to go inside to reach the screw without causing any damage to the mouse screw hole.
      - After removing the screw, invert the mouse back to its normal position – the scroll wheel and the left click and right click buttons facing you. There will be a gap between the top and the lower cover of the optical mouse and you can now apply slight force to increase the gap along the whole body of the mouse. You can see the upper back portion coming up. Now to pull out the upper front portion apply some force in the backward direction so that the female grooves in the mouse upper inside portion comes out of the male lower portion.
      - Now the top portion of the mouse will come outside and you can see the left click button, right click button assembly (mechanical + electronics in the form of a box) on the PCB (printed circuit board) lower portion. You can now use a good quality brush rinsed with isopropyl alcohol to clean all the parts of the mouse including the top plastic casing, scroll wheel and sensors, LED assembly (after removing the PCB from its latches) and the left click and right click buttons sensors assembly. You can also clean the optical mouse connector also that fits into computer so that it makes better contact with your computer’s mouse connector.
      - Allow few minutes for all the parts to dry and then physically confirm that they are not wet. BTW – Isopropyl alcohol is not good conductor of electricity, so even if it is slightly left on the PCB, it won’t harm your mouse and PC when powered ON. After, all the cleaned parts have been physically confirmed for drying, pack them back using now the reverse logic of disassembling them. The most important is to make sure that the upper plastic cover with female grooves fits in the male grooves of the lower mouse portion and the left click and right click buttons click is OK. Don’t forget to make sure that the LED glass cover at the bottom (below the PCB) is fitted properly.
      - After you have tightened the screw (invert the mouse to do so) of the lower plastic cover with the upper cover, the mouse should be connected back to the computer.
      From the steps given, this cleaning operation looks difficult but when you start doing it with some patience and logic, you will find it easy. It’s not rocket science :)
      I am sure that after you have done the internal cleaning of your optical mouse as per the steps explained above, your optical mouse will start working normally – right click, left click, drag, drop, double click, scrolling – every mouse operation working fine as it used to work when the mouse was new.
      Oh, in case, your time is invaluable and you don’t want to spend time (few minutes) in opening, cleaning and packing your computer mouse back, buy a new one! A brand new good quality wired optical mouse should not cost more than $ 20.
      Did these mouse cleaning steps for electromechanical (with track ball) and optical mouse (with LED generation and detection) helped you? I hope yes!
      Let me know if I am right?
      Read More..

      0 Using Your Digital Camera Flash Memory Stick To Store and Transfer Files From One PC To Another in Emergency

      This tip is to help my friends who sometimes don’t have secondary storage devices/media or network access to transfer files from one PC to another. In such cases, they can use their normal digital camera with flash memory stick and USB connectivity to transfer files from one computer to another remote computer.


      People often think that the digital camera flash memory is only meant for transferring photo files from their camera to their PC/laptops. No! The flash memory stick of the digital camera is like a normal USB disk and can be used to store and transfer files (non photo format) from one computer to another.
      More specific details of the scenario follow:
      One of my friend came to me as Internet access at his office wasn’t working and he wanted to download files from my Internet connected PC and then carry them on his CD to the office.

      After downloading the files, his CD didn’t get recognized even after formatting etc. on my Windows Vista Business PC. It had happened earlier also that the CD’s burnt at my DVD writer weren’t recognized at his Windows XP PC. I didn’t have a USB drive and neither did he and moreover, He didn’t have a laptop or some other way of carrying the files. He wanted to desperately carry the files from my PC today only and there didn’t seem to be any easy method of carrying those small sized files to his remote Windows XP PC (with USB port).
      I got an idea. I attached my Sony CyberShot DSC-P100 digital camera with my PC – Dell Vostro 400 USB port, powered ON the camera, it got detected as a removable drive with F:. Now I made a folder on the Digital camera flash memory stick drive (shown as F: on my PC) and transferred the small sized files from my PC to the camera flash memory. My camera had a total of 255 MB flash memory capacity and the files to be copied from my PC for my friend were only of 156 KB.
      After copying was over, I closed the digital camera drive window (F:), left clicked on its USB icon on the right bottom taskbar and then clicked on Safely remove Sony DSC – Drive(F:). Got the standard “Safe To Remove Hardware Message”.
      I powered off the Sony Digital DSC -P100 camera and gave it with the camera to PC USB attachment cable to my friend. He took it and attached the CyberShot camera to his office Windows XP PC with USB port and was able to copy his files from the camera flash disk to his PC without any issues.
      So, the moral of this post is that in case of emergency, you can use your digital camera flash memory stick to store and transfer files from one computer to another. This can be a useful method where the file transfer methods such as network (LAN), Internet, CD, DVD and normal USB disk are not working/not available.


      As usual, some screenshots relevant to this post are given:
      USB device detected on attaching Sony Cybershot P100 Camera to USB port
      Using Ctrl key and the mouse left click to select only the required files in Windows Explorer
      Creating a New Folder by Right Clicking on the blank area of the Removable disk window and then clicking on New and Folder
      Successful copying of files from one drive to another drive in Windows Vista Business
      Single left clicking on the USB icon on taskbar to remove the camera attached with PC USB port
      Standard message of USB device can be removed safely on Windows Vista
      Hope that you would like this post of mine.
      Let me know your comments on the idea of using Digital camera flash memory stick for storing and transferring computer files from one PC to another PC.
      Cheers!


      Read More..
      Related Posts with Thumbnails